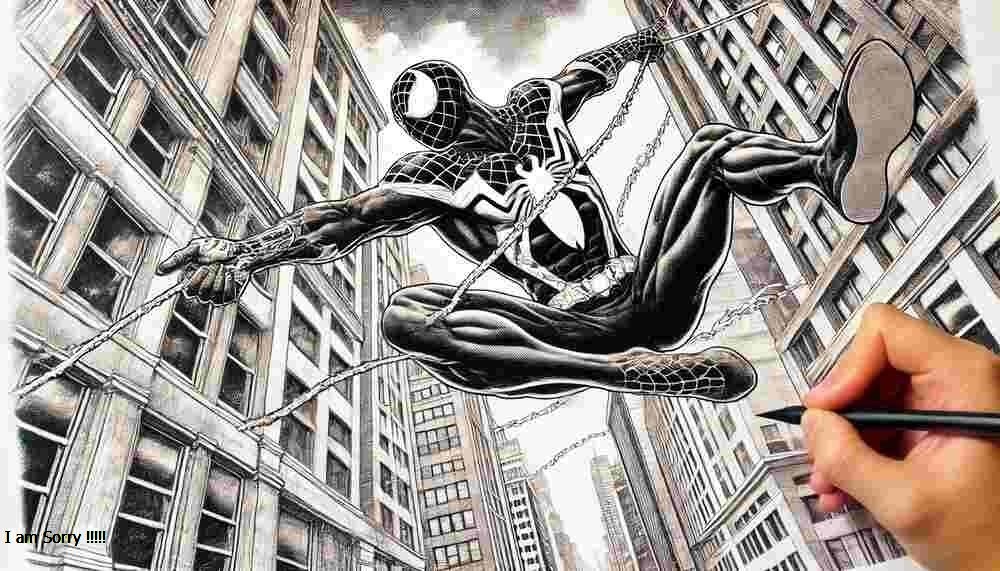
Drawing superheroes and incredibly iconic characters like Spiderman can be thrilling yet challenging. With his dynamic poses and intricate costume details, capturing Spiderman on paper requires skill and patience. However, with guidance and techniques, even beginners can create a stunning rendition of this beloved hero. This comprehensive guide will break down the process into manageable steps, ensuring that anyone can master the art of drawing Spiderman.
Materials You Will Need
Gathering all the necessary materials before beginning the drawing process is essential. Having the right tools can significantly improve the quality of your artwork.
- Pencils: A range of pencils from HB to 6B for sketching and shading.
- Eraser: A kneaded eraser for lightening lines and correcting mistakes.
- Paper: High-quality drawing paper or sketchpad.
- Inking Pens: Fine liners or brush pens for outlining.
- Coloring Tools: Colored pencils, markers, or paints, depending on your preference.
- Ruler and Compass: For drawing straight lines and perfect circles.
Understanding Proportions and Anatomy
Before starting your Spiderman drawing, it’s crucial to understand basic human anatomy and proportions. Like most superheroes, Spiderman has an athletic build with exaggerated muscle definition. Here’s a quick overview:
- Head: Start with an oval shape, slightly elongated.
- Torso: The torso should be broader at the shoulders and narrow down at the waist.
- Arms and Legs: Muscular and well-defined, emphasizing the forearms and calves.
- Hands and Feet: Hands are often large with prominent fingers, while the feet are usually depicted in dynamic poses.
Understanding these proportions will help you sketch Spiderman more accurately and make adjustments as needed.
Step 1: Basic Outline
Begin by lightly sketching the basic shapes that will form Spiderman’s body. Use simple geometric shapes to outline the head, torso, and limbs. This initial step is about getting the proportions right, so don’t worry about the details yet.
- Head and Torso: Draw an oval for the head and a rectangle for the torso.
- Limbs: Add lines for the arms and legs, using circles for the joints (shoulders, elbows, knees).
- Hands and Feet: Sketch basic shapes for the hands and feet, keeping them proportional to the rest of the body.
Step 2: Adding Muscles and Features
Once the basic outline is complete, add muscle definition and refine the shapes. Spiderman’s suit accentuates his muscular build, so focus on the major muscle groups.
- Chest and Abs: Define the pectoral muscles and add the abdominal muscles. Spiderman has a lean yet muscular build, so keep the lines smooth and not too bulky.
- Arms and Legs: Add muscle definition to the arms and legs. The biceps, triceps, and forearms should be well-defined.
- Face: Sketch the mask’s outline, including the large, expressive eyes. The mask covers his entire face, so focus on getting the shape and size of the eyes right.
Step 3: Detailing the Suit
Spiderman’s suit is one of the most recognizable aspects of his appearance. It has a web pattern, a spider emblem, and a distinct color scheme. Here’s how to add these details:
- Web Pattern: Start by drawing the web lines. These should radiate from a central point, usually the chest emblem, and curve around the body. The lines should be evenly spaced and follow the contours of the muscles.
- Spider Emblem: Draw the spider emblem on the chest. This can vary depending on the version of Spiderman you’re drawing, but it typically features a stylized spider.
- Suit Lines: Add the lines that separate the red and blue parts of the suit. The red usually covers the mask, shoulders, and parts of the arms and legs, while the blue covers the rest.
Step 4: Inking the Drawing
Inking is a crucial step that brings your drawing to life. It adds depth and contrast, making the lines cleaner and more defined.
- Outline: Carefully go over your pencil lines with an inking pen. Use a fine liner for the web pattern and a thicker pen for the outline of the body and significant features.
- Shading: Add shading to give your drawing a three-dimensional look. Focus on areas that would naturally be in shadow, such as under the arms, around the muscles, and along the sides of the body.
- Details: Ink the more minor details, like the eyes and spider emblem, with precision.
Step 5: Coloring Your Drawing
Coloring is the final step and can significantly enhance the visual appeal of your drawing. Spiderman’s classic colors are red and blue, with black web lines.
- Base Colors: Start by filling in the red and blue areas of the suit. Use smooth, even strokes to avoid streaks.
- Shading and Highlights: Add darker shades of red and blue to shadow areas and lighter shades for highlights. This will give your drawing more depth and realism.
- Final Touches: Add any final touches, such as reflections in the eyes or additional shadows, to make your drawing pop.
Tips for Improvement
Drawing Spiderman, or any complex character, requires practice and patience. Here are some tips to help you improve:
- Practice Regularly: The more you draw, the better you’ll get. Try drawing Spiderman in different poses to challenge yourself.
- Study References: Look at comic books, movies, and other Spiderman artwork. Analyze how artists depict him and incorporate those techniques into your work.
- Use Guidelines: Feel free to use guidelines and references to help with proportions and details.
- Take Breaks: Take a break if you’re feeling frustrated or stuck. Sometimes, stepping away and returning later can give you a fresh perspective.
Conclusion
Drawing Spiderman can be a rewarding experience, allowing you to bring to life one of the most iconic superheroes in comic book history. Following this step-by-step guide, you can develop your skills and create a detailed and dynamic drawing of Spiderman. Remember to be patient with
yourself, practice regularly, and, most importantly, have fun with the process. Whether you’re a beginner or an experienced artist, there’s always something new to learn and explore in drawing.
Also Read Interesting articles at Amazing Posting


